
WordPress Login Page Redirect Loop: Step-by-Step Troubleshooting

A WordPress login page redirect loop prevents administrators from accessing the management dashboard. When you enter valid credentials on the wp-login.php page, the browser simply reloads the page or redirects back to the login screen without showing an explicit error message. This frustrating behavior locks users out of their website entirely.
Understanding how to resolve a WordPress login page redirect loop requires systematically checking cookie domain settings, URL configurations, site cache layers, and core permalink rules. Observed technical support patterns indicate that most redirect loops stem from recent domain migrations, misconfigured SSL certificates, or conflicting security plugins.
Try Basic URL & Cookie Fixes First If:
- The redirect loop started immediately after changing Site URL settings in the dashboard.
- You recently installed a new browser extension or updated a caching plugin.
- The site displays a clean login page but repeatedly refreshes upon submitting credentials.
Skip to Advanced Server Edits If:
- You recently completed a manual database migration or domain change.
- The site forces an HTTP to HTTPS redirect loop across all administrative pages.
- You lack admin dashboard access and need to bypass active plugins immediately.

What Causes the WordPress Login Page Redirect Loop?
A WordPress login page redirect loop occurs when authentication cookies fail to match the domain parameters expected by the server. When a user submits login credentials, WordPress authenticates the user and attempts to set a session cookie. If the session cookie domain does not match the requested administrative URL, WordPress rejects the authorization header and redirects the user back to wp-login.php.
Several underlying system failures trigger this continuous redirection behavior:
- Site URL Mismatches: Discrepancies between the siteurl and home records in the database.
- Corrupted Cookies or Cache: Outdated session cookies stored in the browser or server proxy layer.
- Broken Permalinks: Corrupted rewrite rules inside the server configuration file (.htaccess or nginx.conf).
- Plugin and Theme Conflicts: Security or caching plugins injecting improper header redirect directives.
- SSL Proxy Mismatches: Reverse proxies sending HTTP traffic to servers configured exclusively for HTTPS.
FileZilla FTP Access & Plain Text Configuration Edits
Using a dedicated FTP client provides direct file system access to edit configuration files and rename misbehaving plugin directories without dashboard access. This method works across all web servers running Linux, macOS, or Windows environments.
Step 1: Clearing Browser Cache, Cookies, and Site Data
Browser cookies store authentication tokens required to maintain active administrative sessions. When these tokens become stale, your browser reloads the authentication screen indefinitely. Clearing local storage and session data isolates your web browser from server-side issues.
To clear browser data efficiently:
- Open your web browser settings and locate the Privacy and Security panel.
- Select the option to clear browsing data for site-specific cookies.
- Search specifically for your website domain name.
- Remove all cookies associated with wordpress_logged_in_ and wordpress_test_cookie.
- Restart your browser and attempt to log in using an Incognito or Private window.
If testing in an Incognito window resolves the issue, local browser extension interference or corrupted local cookies caused the lockout. If the issue persists across multiple browsers, the fault lies on the web server.
Step 2: Defining Hardcoded Site URLs in wp-config.php
Mismatched site URLs cause an instant WordPress login page redirect loop. If the database contains http:// while your site enforces https://, the server rejects the login session. Hardcoding these values in the core configuration file overrides database errors immediately.
Connect to your web server using an FTP client or hosting File Manager. Locate the wp-config.php file in the root directory. Open the file in a plain text editor and insert the following lines above the comment that reads “That’s all, stop editing!”:
define('WP_HOME', 'https://example.com');define('WP_SITEURL', 'https://example.com');
Replace example.com with your exact domain name. Ensure you include the correct protocol prefix (http:// or https://) and match whether your site uses the www prefix. Save the file and upload it back to your server. Try logging into your administrative dashboard again.
Step 3: Resetting the Server .htaccess Rewrite Rules
Corrupted rewrite rules in the .htaccess file frequently block administrative access. Web servers using Apache rely on .htaccess to direct incoming requests to the correct index.php file. Improper plugin configurations or manual edits can create infinite redirection loops.
Resetting the configuration file forces the server to regenerate default routing rules:
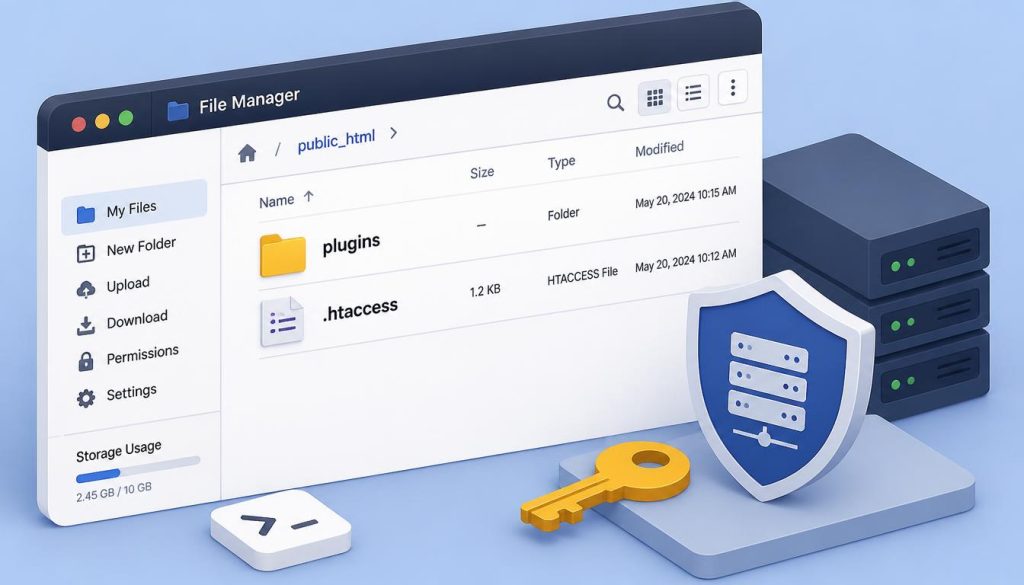
- Connect to your server root directory (usually public_html or www) using FTP.
- Locate the .htaccess file. If invisible, enable the option to show hidden files in your FTP client.
- Rename the file to .htaccess_old to temporarily disable its rules.
- Attempt to access your login page at example.com/wp-login.php.
If you can log in after renaming the file, navigate to Settings > Permalinks in your dashboard and click Save Changes. This action automatically generates a fresh, fully functional .htaccess file.
Step 4: Deactivating All Plugins via FTP or SSH
Security plugins, redirection tools, and caching suites frequently introduce header modifications that break session management. When locked out, deactivating all plugins simultaneously helps determine if a plugin is causing the WordPress login page redirect loop.
Because you cannot access the admin panel, perform this isolation step directly on the server file structure:
- Open your FTP client and navigate to the wp-content directory.
- Locate the folder named plugins.
- Rename the plugins folder to plugins_deactivated.
- Load the wp-login.php page in your web browser.
If the login screen functions correctly, a plugin conflict was responsible. Rename the folder back to plugins, enter the folder, and rename individual plugin directories one by one to pinpoint the exact culprit causing the issue.
FTP File System Isolation Strengths
- Bypasses administrative lockout constraints completely.
- Requires zero database access or command-line experience.
- Reversible in seconds by restoring original folder names.
Limitations
- Requires managing individual folder names manually.
- Deactivates all active plugins simultaneously across the site.
- Does not clean corrupt database entries left by plugins.
Step 5: Repairing Site URLs Directly in phpMyAdmin
If editing wp-config.php does not clear the WordPress login page redirect loop, database parameters in the wp_options table may be misconfigured. Modifying the database directly fixes lingering redirect rules.
Log into your hosting control panel and launch phpMyAdmin. Select your website database from the left-hand menu. Locate and click on the wp_options table (note that your database table prefix may differ from wp_):
Locate the following two option_name rows inside the database table:
- siteurl: The full address used to reach your core WordPress files.
- home: The address users type into their web browser to reach your site homepage.
Verify that both values match perfectly. Ensure neither value contains a trailing slash at the end (e.g., use https://example.com instead of https://example.com/). Double-click the option_value field, correct any discrepancies, and press Enter to save your changes.
Comparing Essential Server Diagnostic Tools
Troubleshooting server redirects effectively requires choosing the right management tool based on technical comfort and access levels. The table below outlines standard utility choices for resolving system access failures.
| Diagnostic Tool | Free vs Paid Tier | Key Features | Resource Usage | Supported OS |
|---|---|---|---|---|
| FileZilla FTP Client | Free / Open Source | Direct SFTP/FTP file management and permission controls | Very Low | Windows, macOS, Linux |
| phpMyAdmin Database Portal | Free / Server Bundled | Direct SQL execution and table value modification | Low (Server-Side) | Web Browser Based |
| Hosting File Manager | Free with Hosting | Browser file browsing and code editing | Minimal | Web Browser Based |
| WP-CLI Command Line | Free / Open Source | Direct database queries and plugin control via SSH | Extremely Low | Linux, macOS Server |
Resolving SSL and Reverse Proxy Redirect Conflicts
Sites operating behind reverse proxies like Cloudflare or Sucuri frequently encounter a WordPress login page redirect loop due to SSL configuration mismatches. If your edge proxy communicates with your origin server over unencrypted HTTP (port 80) while expecting HTTPS (port 443) from visitors, an infinite loop occurs.
To fix flexible SSL redirect issues, force WordPress to recognize reverse proxy SSL headers properly. Insert the following code snippet near the top of your wp-config.php file:
if (isset($_SERVER['HTTP_X_FORWARDED_PROTO']) && $_SERVER['HTTP_X_FORWARDED_PROTO'] === 'https') { $_SERVER['HTTPS'] = 'on';}
This code explicitly instructs WordPress that incoming requests routed through a reverse proxy are secure. Consequently, the core authentication engine generates correct HTTPS cookie tokens without triggering unexpected redirects.
Key Takeaways
- Clear local cookies for wordpress_logged_in_ before editing server files.
- Hardcode matching WP_HOME and WP_SITEURL constants inside wp-config.php.
- Rename the .htaccess file to clear corrupted Apache rewrite directives.
- Deactivate plugins via FTP by renaming the wp-content/plugins folder.
- Check phpMyAdmin wp_options table entries for trailing slashes or URL mismatches.
- Configure reverse proxy SSL headers if using Cloudflare Flexible SSL mode.
Final Verdict and Fix Effectiveness
Resolving an administrative lockout caused by misconfigured URL headers requires systematic testing of local cookies, core constants, and server rewrite files. Following these step-by-step diagnostic measures recovers administrative access cleanly without requiring a full site restore.
Solution Effectiveness Score: 9.2 / 10